
By GM Ulvi Bajarani, Founder and Head Coach of Azeri Chess Academy
The opening is not a test of how many moves you can remember. It is the stage of the game in which you prepare your pieces for the struggle ahead. A familiar sequence is useful only when you understand what it achieves and notice when your opponent changes the position.
For beginners, I recommend building opening decisions around three principles:
- Fight for the center: e4, e5, d4 and d5.
- Develop your pieces.
- Make your king safe, usually by castling, but not automatically in every position.
These principles explain why many good opening moves work. They also help you choose a reasonable move when you no longer recognize the position. My practical starting recommendation is 1.e4 with White, and 1…e5 against 1.e4 or 1…d5 against 1.d4 with Black.
This is a training recommendation, not a claim that other sound openings are bad. The aim is to learn how to play chess, rather than how to reproduce one setup.
Fight for the center
The four central squares are e4, e5, d4 and d5. Pieces placed near the center often have more useful options than pieces on the edge, and central influence helps you move your forces toward either side of the board.
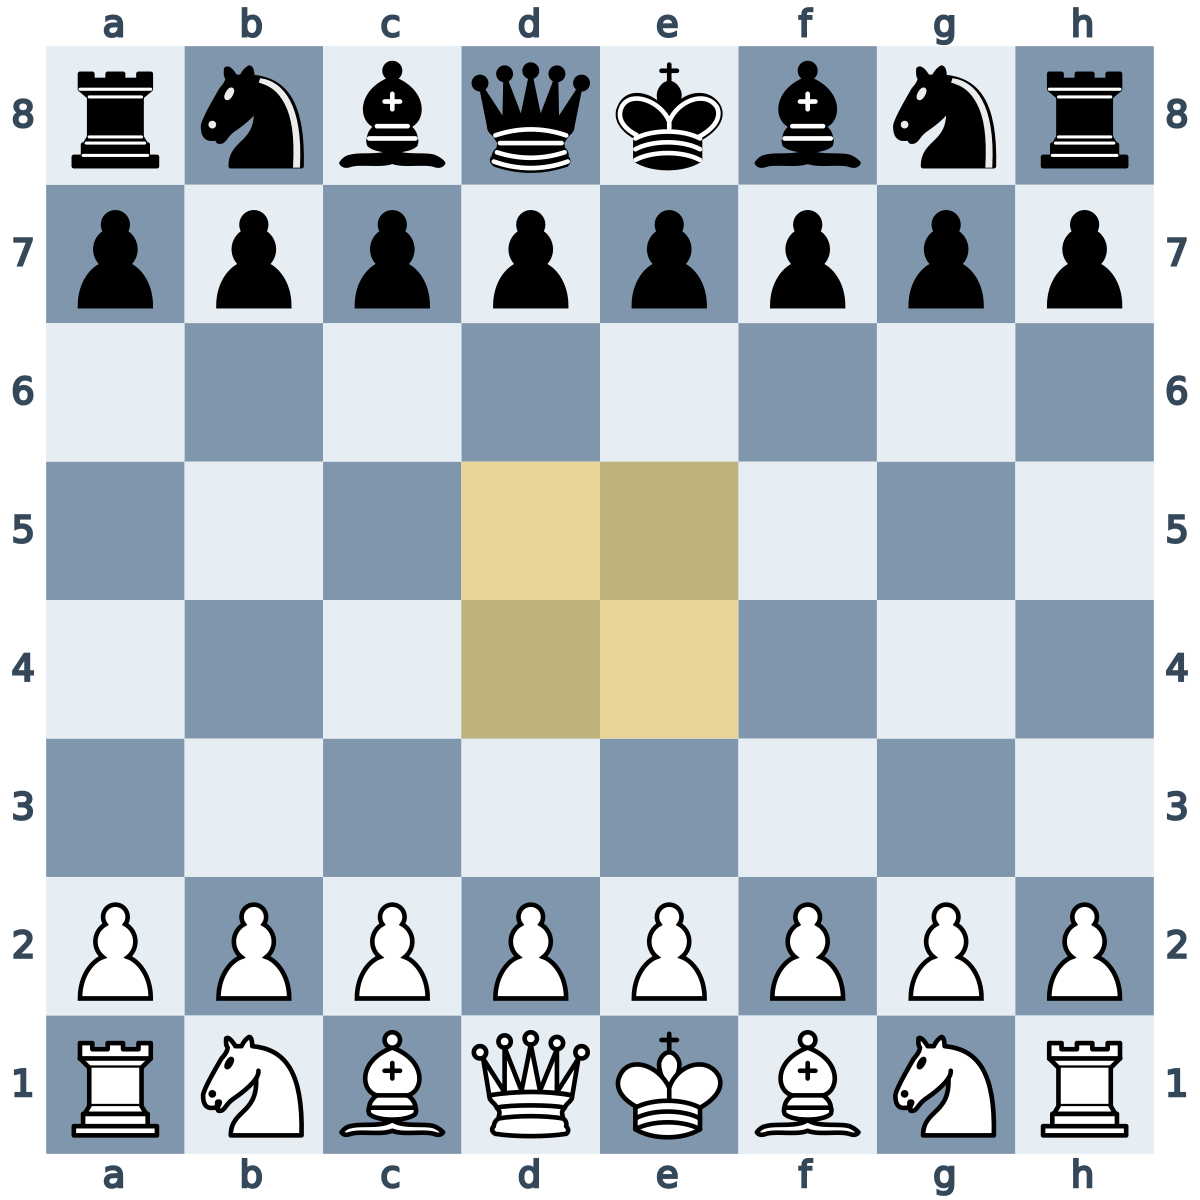
You can fight for these squares in two main ways: occupy them with pawns or pieces, and attack them from elsewhere. You do not need to place a pawn on every central square. You do need to understand which central squares you and your opponent control.
After 1.e4, White occupy e4 and the pawn attacks d5 and f5. The move also opens lines for the bishop on f1 and the queen on d1. After 1…e5, Black do the same: their pawn occupies e5, attacks d4 and f4, and releases their bishop and queen.
Now 2.Nf3 develops a knight and attacks Black's e5-pawn. Black can answer 2…Nc6, developing a knight while defending that pawn. These are not unrelated moves from a memorized list. Each move has a visible purpose.
Control and occupation are different. A pawn on e4 does not defend its own square, and putting a piece in the center does not make it safe. Before moving there, check whether your opponent can capture it and whether the exchange would favor you.
Do not confuse central ambition with endless pawn moves
Central pawns can gain space, but they can also become targets. If you spend several moves pushing pawns while your opponent develops, you may create a large center that your pieces cannot support.
A useful question is not simply, “Can I advance another pawn?” Ask, “What does this move control, what does it leave behind, and are my pieces ready to support it?”
When your opponent has central pawns, look for a way to challenge them. A pawn break is a pawn move that attacks the opposing pawn structure and may open lines. In many openings, understanding the right pawn break matters more than remembering where to put a bishop.
Develop your pieces
Development means bringing your pieces into useful play. During the opening, your knights and bishops generally need to leave their starting squares so that they can influence the center, defend important points and cooperate.
Useful development is more than moving a piece off the back rank. A knight may have several legal squares, but some contribute much more than others. Ask what the piece will attack or defend from its new square and whether it can be driven away easily.
As practical guidelines:
- Bring several pieces into the game instead of repeatedly moving the same one without a concrete reason.
- Avoid bringing the queen out merely to make an early threat if your opponent can develop by attacking her.
- Use pawn moves that support your position or open useful lines, rather than moving pawns simply because you do not know what else to do.
- Choose squares for both knights and bishops according to the position. “Knights before bishops” can be a useful reminder, but it is not a law.
These guidelines do not forbid a necessary second move with a piece. If a piece is attacked, a tactic wins material, or a specific threat must be stopped, you must respond to what is happening on the board.
An example of coordinated development
Consider this illustrative sequence:
1.e4 e5 2.Nf3 Nc6 3.Bc4 Bc5 4.O-O Nf6 5.d3 d6
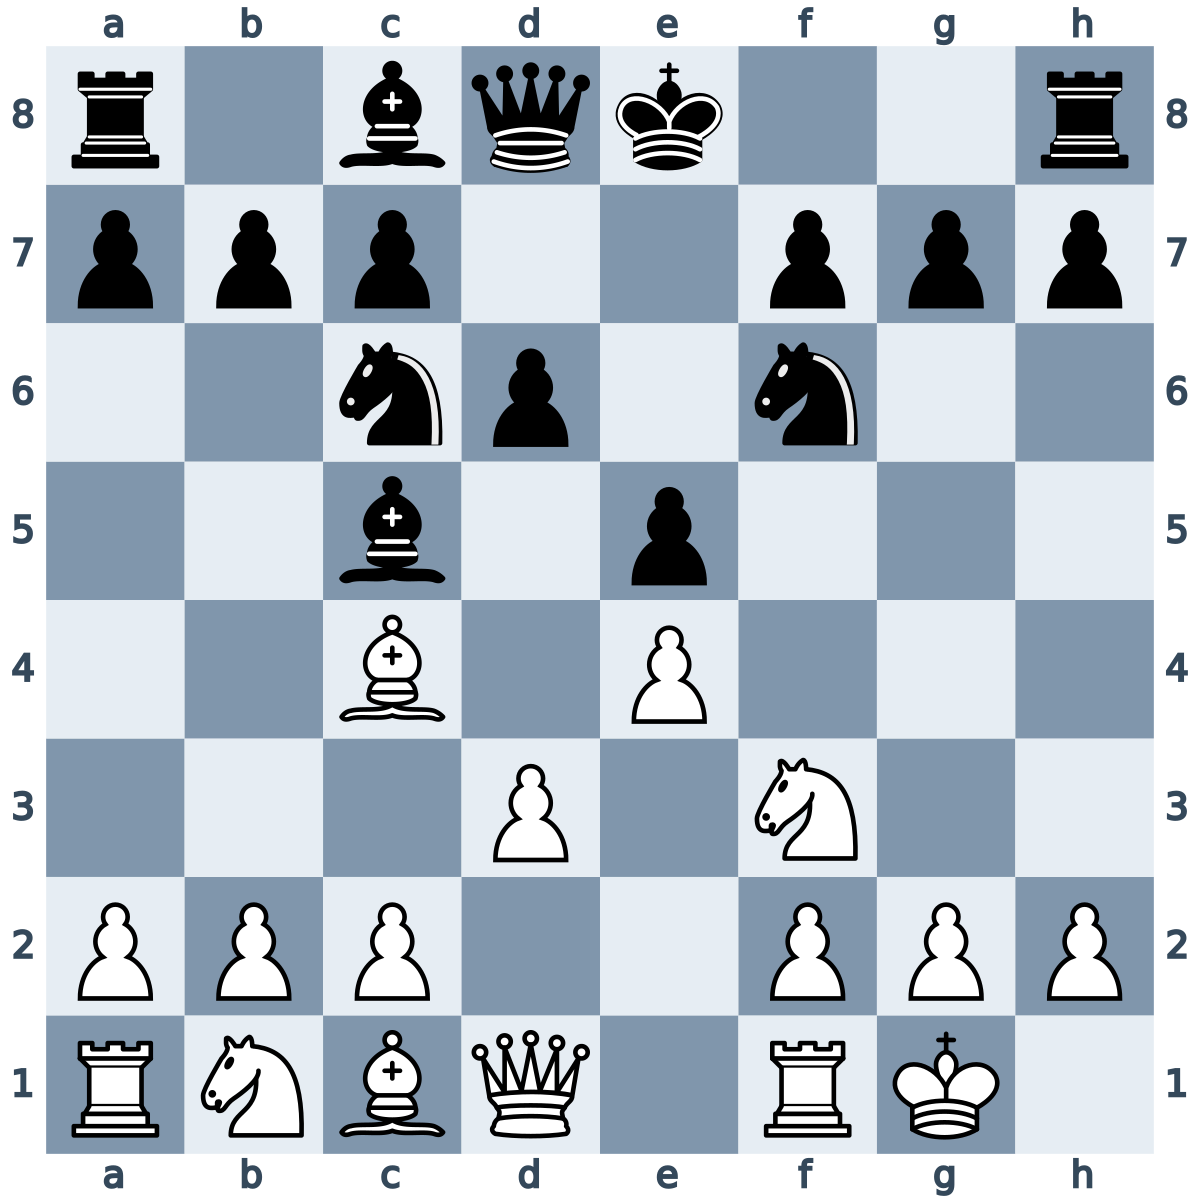
White and Black have both occupied the center and developed pieces. White's bishop on c4 eyes f7, while Black's bishop on c5 eyes f2. White have castled, and the move d3 supports e4 and opens a diagonal for the bishop on c1. Black's …d6 similarly supports e5 and releases the bishop on c8.
The position is not finished. Both sides still need to complete development and choose a plan. For example, White may consider developing the queenside knight or bishop, while Black may prepare to castle. The right order depends on the opponent's moves.
This line is an example of ideas working together, not a sequence to play regardless of what your opponent does.
Make your king safe
The principle is king safety. Castling is usually the most convenient way to improve it, but castling and king safety are not identical.
Castling often moves the king away from central files that may open and brings a rook closer to the center. For beginners, preparing to castle early is a sensible default. Leaving your king in the center while opening the position or launching an attack can expose you to checks and threats before your own pieces are ready.
However, do not castle simply because you have reached a particular move number. Check the position first:
- Is castling legal? Your king cannot castle out of check, through an attacked square or into check. The other castling conditions must also be satisfied.
- Will the destination actually be safer? Castling toward an opponent's concentrated attack can be dangerous.
- Is there an immediate threat that must be answered first?
- What happens if the center opens before your next move?
Sometimes a closed center allows castling to be delayed. Sometimes, after queens and other attacking pieces have been exchanged, a king can remain central without the same danger. Neither situation guarantees safety: you must still consider checks, pawn breaks and the pieces left on the board.
Do not use these exceptions as an excuse to ignore your king. Learn the normal benefit of castling first, then recognize positions in which another decision is justified.
What beginners should play with White
My recommendation is to begin with 1.e4.
It immediately occupies a central square and opens lines for two pieces. In many common replies, the struggle for the center becomes concrete quickly: pawns are attacked, pieces develop with threats, and open lines make the consequences of lost time easier to see.
Playing 1.e4 does not guarantee an open position. Black can choose structures with a closed center, and you will still need to learn their plans. Nevertheless, it provides a useful starting point for practicing central play, development and king safety together.
Start by understanding the moves you are playing. Against 1…e5, for example, 2.Nf3 gives you an immediate explanation: develop a piece and attack a central pawn. You can then learn a straightforward continuation such as the Italian Game with Bc4, rather than trying to memorize a large repertoire at once.
What about 1.d4 and the London System
The move 1.d4 is entirely sound. My concern is not the move itself, but how a beginner uses it.
A particular concern is the beginner who learns the London from heavily promoted courses and remembers the setup without understanding central pawn breaks. Such players can become familiar with Bf4, e3 and c3 while remaining unaware of the role of c2-c4 in challenging a pawn on d5. They know the arrangement, but not how to question the opponent’s center.
In many 1.d4 positions, c2-c4 is an important way to challenge a black pawn on d5. Other positions call for an e-pawn break or a different plan. The point is to recognize and prepare the relevant central advance, not to insist on c4 in every position.
The Queen's Gambit shows the idea clearly:
1.d4 d5 2.c4
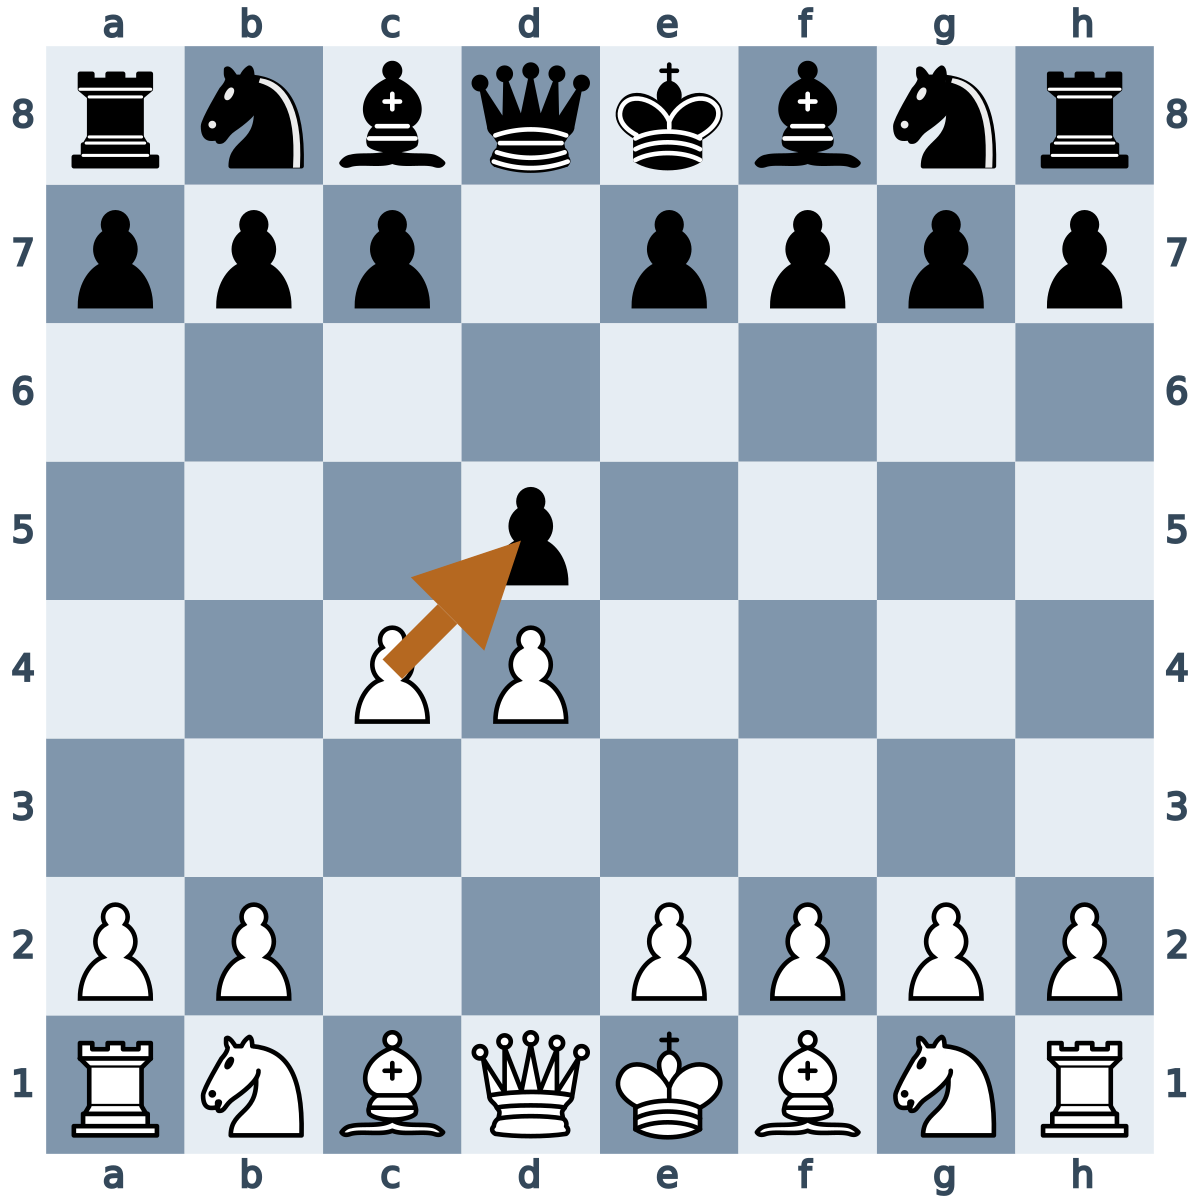
White's c-pawn attacks Black's d5-pawn. White are challenging Black's central foothold rather than simply adding another piece to a fixed setup.
After 2…dxc4, Black have captured the offered pawn, but their d-pawn has left d5. White can develop and often recover the pawn later. For example, after 3.Nf3 Nf6 4.e3, White prepare Bxc4. If Black continue 4…e6, then 5.Bxc4 regains the pawn while developing the bishop.
The Queen's Gambit is not usually intended as a permanent pawn sacrifice. In some other lines, White may genuinely give up a pawn for central control, activity or time. Those decisions require calculation; “fight for the center” does not mean sacrificing a pawn without checking the consequences.
The London System can also be played actively and with understanding. It is not an opening that prevents improvement. The training risk is relying on a familiar setup while avoiding the questions that the position asks. For a beginner building those habits, I prefer 1.e4 as the initial learning route.
What about 1.Nf3 and 1.c4
Both are sound first moves. I do not recommend them as the first repertoire for most beginners because their flexibility can make the learning task less direct.
These moves can lead to many different pawn structures and transpose into other openings. To use that flexibility well, you need to understand which central structure you are aiming for and when to change your plan.
They are not moves to avoid forever. They are options to explore when you have a firmer understanding of central play and the reasons behind your development choices.
What beginners should play with Black
I recommend beginning with a symmetrical central response.
- Against 1.e4, play 1…e5.
- Against 1.d4, play 1…d5.
This gives Black an immediate central presence and a clear basis for development. It is a starting framework, not an instruction to copy every subsequent white move. Once White create a threat or change the pawn structure, Black must respond to that position.
Against 1.e4
After 1.e4 e5, develop your pieces while keeping track of the central pawns. The sequence 2.Nf3 Nc6 is a useful example: White attack e5 and Black defend it while developing.
You still need to recognize threats. A familiar setup does not excuse ignoring an attack on f7, a hanging pawn or a tactical opportunity. Learn a small number of common positions through their ideas, then review the unfamiliar ones that occur in your games.
Against 1.d4
After 1.d4 d5, White may challenge your center with c4. If they do, you need a sensible response to that challenge rather than a separate, automatic development routine.
If White do not play c4, …c5 is often an active way for Black to challenge the pawn on d4. For example:
1.d4 d5 2.Bf4 c5 3.e3 Nc6 4.Nf3 Nf6
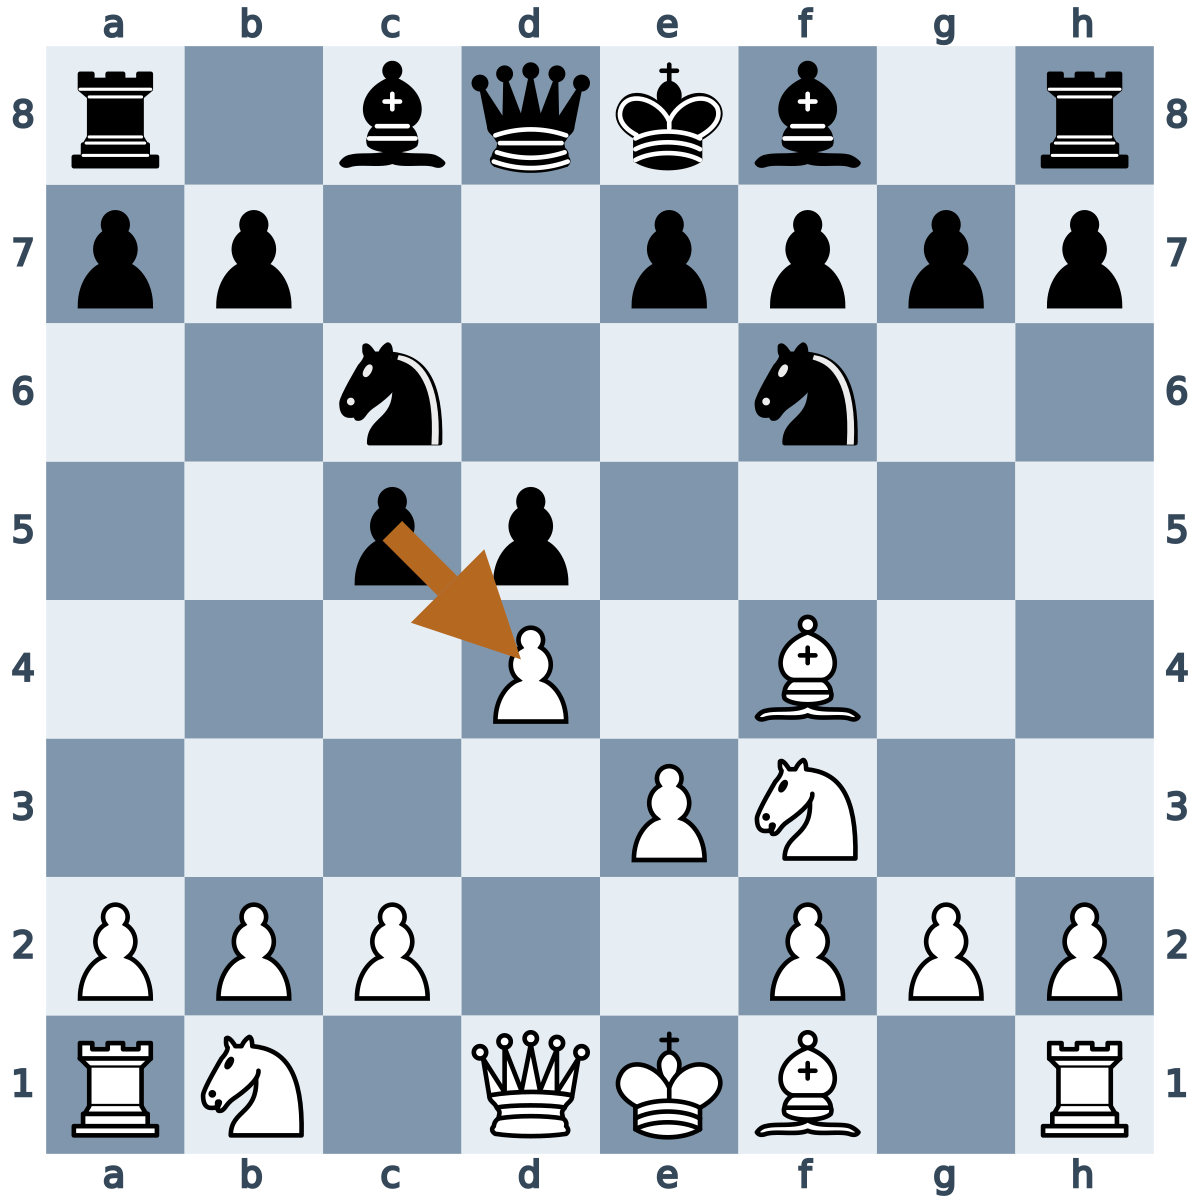
Black's …c5 attacks d4, and …Nc6 adds another attacker to that square. The point is to contest White's center rather than allow them to complete their preferred arrangement without opposition.
The move …c5 is not limited to positions without c4; it is also an important break in many Queen’s Gambit structures. The timing is not automatic. Check whether White can capture on c5, whether you can recover the pawn or obtain sufficient compensation, and whether another threat needs attention. The example illustrates a central plan, not a universal answer to every move after 1.d4.
Against 1.c4 and 1.Nf3
For a compact starting repertoire, 1.c4 can be met by 1…e5, occupying a central square, and 1.Nf3 can be met by 1…d5, establishing a central pawn.
White have not yet committed both central pawns, so pay attention to their next moves. You may reach a familiar structure by a different move order. There is no need to memorize every possible branch before playing: learn the basic idea and investigate the positions that actually arise in your games.
Check threats before applying a principle
Opening principles guide your decisions, but they do not replace calculation.
Before choosing a developing move, ask what your opponent's last move changed. Are you in check? Is a piece attacked? Is there a threat of mate? Can either side win material with a check, capture or direct threat?
A move can look principled and still lose immediately. If your opponent attacks your queen, continuing development elsewhere usually does not solve the problem. Equally, if you can win a piece safely, you should not reject the opportunity solely because it requires moving an already-developed piece again.
Use the principles to select sensible candidates. Use calculation to decide whether those candidates work.
Scholar’s Mate and how to prevent it
Scholar’s Mate is an early attack on f7, a square defended only by Black’s king in the starting position. White’s queen and light-squared bishop work together against it. The threat is simple, but it shows why development must be combined with attention to the opponent’s threats.
1.e4 e5 2.Qh5 Nc6 3.Bc4
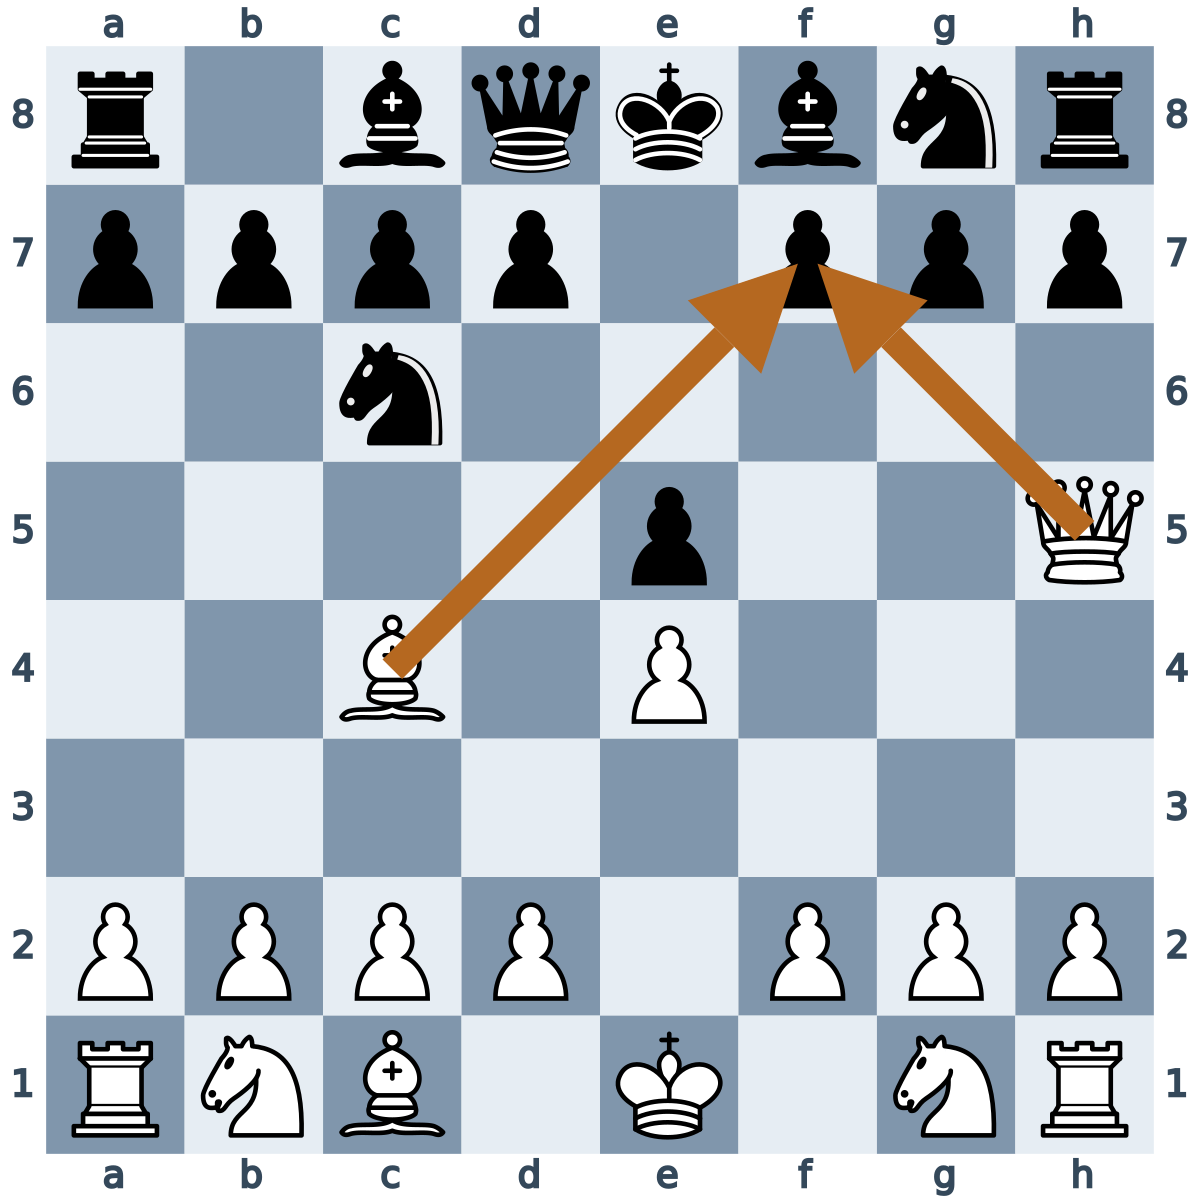
White threaten Qxf7#. If Black overlook this and play 3…Nf6??, then 4.Qxf7# is checkmate. Although …Nf6 develops a knight and attacks the queen, it does not stop the immediate threat. White’s bishop on c4 protects the queen on f7, so Black’s king cannot capture her.
Stop the threat while developing
1.e4 e5 2.Qh5 Nc6 3.Bc4 g6 4.Qf3 Nf6
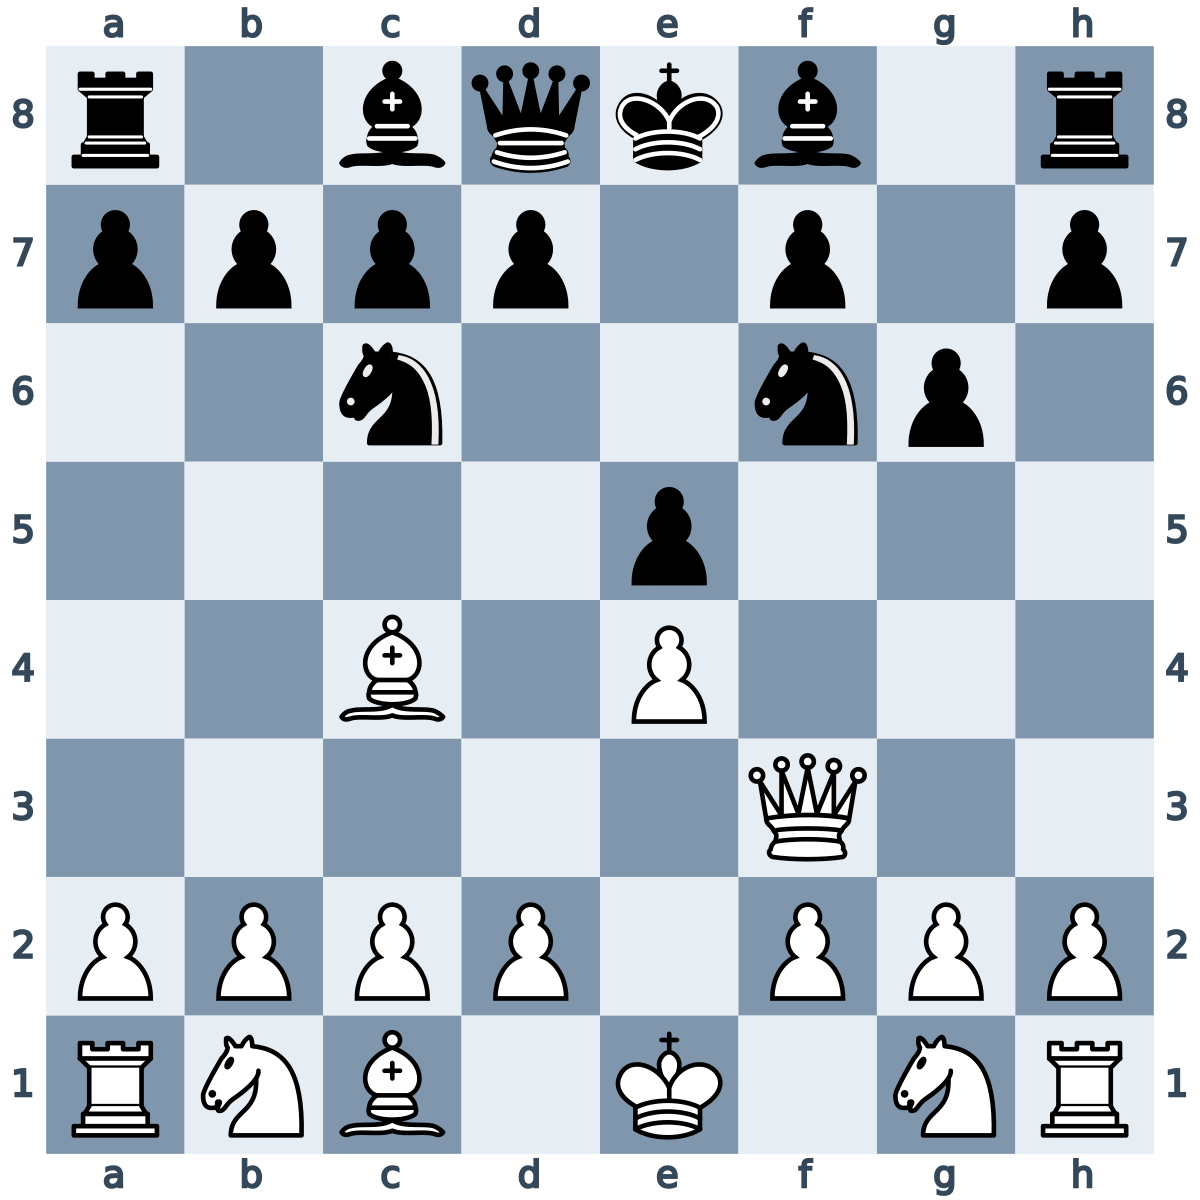
After 3…g6, White’s queen is attacked and the route from h5 to f7 is blocked. White’s 4.Qf3 renews the threat of Qxf7#. Now 4…Nf6 works: the knight blocks the queen’s route along the f-file while developing. Black can continue bringing the remaining pieces into play and prepare to castle, always checking White’s next move.
Move order matters. Playing 2…g6? before defending e5 allows 3.Qxe5+, a double attack on the king and the rook on h8. In the main position after 3.Bc4, 3…Qe7 is another way to meet the threat: the queen protects both f7 and e5.
Do not build your opening repertoire around hoping that your opponent falls for this trap. Learn to recognize it and defend calmly. Fight for the center, develop useful pieces and make your king safe—but check immediate threats before applying any general rule.
A practical opening checklist
Before making your move, ask:
- What is my opponent threatening?
- How are we fighting for e4, e5, d4 and d5?
- Which of my pieces still need useful squares?
- Is my king safe, and what would happen if the center opened?
- Does my intended move leave anything undefended or allow a tactic?
After the game, review the opening before looking only for a named variation. Identify the first move whose purpose you could not explain. Did you lose time with repeated piece moves? Leave your center unsupported? Delay king safety? Miss an opponent's threat?
Choose one concrete lesson from that review and apply it in your next game. Remembering why a move works is more useful than remembering a sequence you cannot adapt.
The starting point
Fight for the center, develop your pieces and make your king safe. For your first repertoire, my recommendation is 1.e4 with White, 1…e5 against 1.e4, and 1…d5 against 1.d4 with Black. Add the other responses gradually and learn how the central pawn breaks work.
The goal is not to reach the same position in every game. It is to reach a playable position, understand what your pieces are doing and recognize what the position requires next.